Choose File > Open..., then select the file or files, and click Open.
Alternatively, drag and drop the file(s) onto the app icon in the Dock or Finder.
Chapter titles are stored in a text track. To create a new text track, do one of the following:
- Choose Chapters > Add Text Track
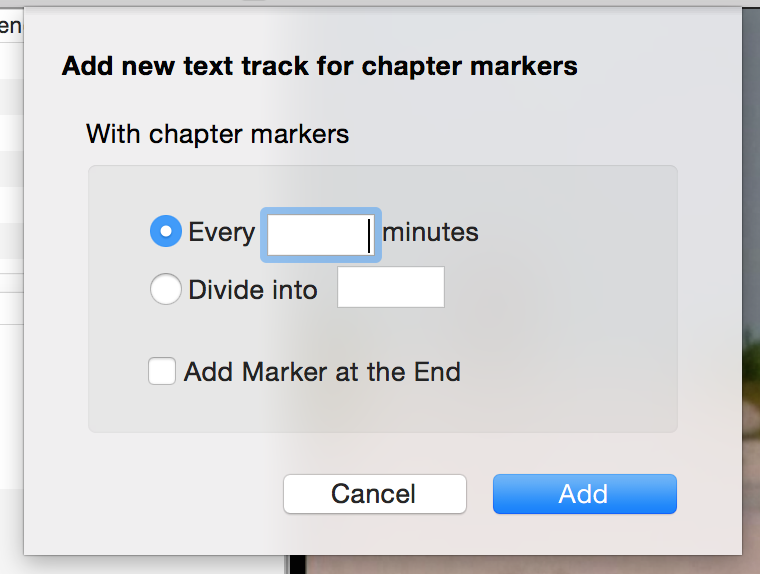
This creates a new text track with a single chapter at the beginning. - Choose Chapters > Add Text Track with Chapters…
A sheet will appear, allowing you to specify the interval for inserting chapters.
You can add multiple text tracks for different languages.
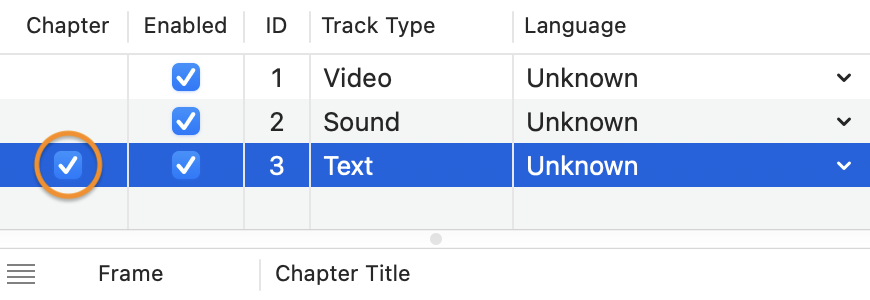
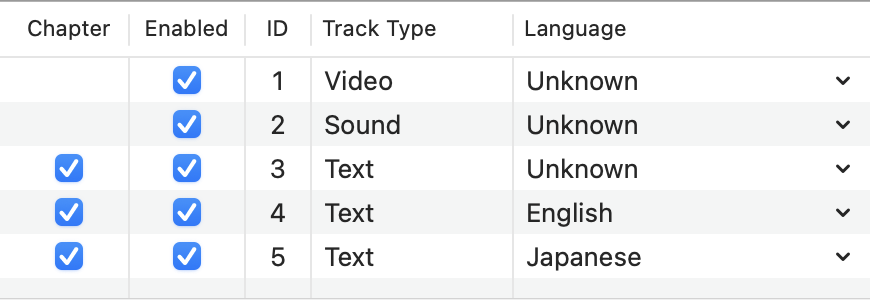
To use a text track as chapters, check the box in the Chapter column for that track.
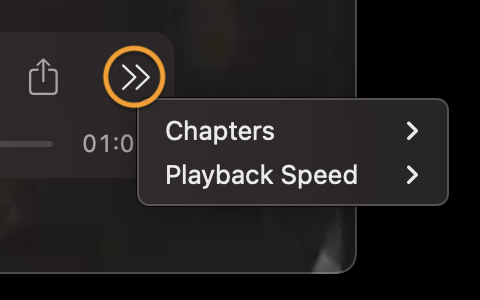
You can select a chapter from a menu or a pop-up button, depending on the media player you're using.
Below is an example of the QuickTime Player controller. The chapter selection button appears only when a valid chapter track is present.
macOS 11 or earlier macOS 12 or later
mChapters allows a file to contain multiple chapter (text) tracks, each with its own language setting. The language setting of a text track does not limit which characters you can use. You can enter any character that is supported by Unicode, regardless of the track's language setting.
When a file has multiple chapter tracks, the chapter track that gets displayed depends on the media player. Even if there is only one chapter track, it may not be displayed depending on its language setting and the playback environment.
The following describes how Apple’s media players handle chapter tracks. Keep in mind how the system language settings on each device may affect chapter display.
- QuickTime Player version 10.5 (1216.2)
- A chapter track with a language listed under System Settings > General > Language & Region > Preferred Languages
- If no track matches the above languages, a chapter track with "Unknown Language"
- If neither is available, no chapters are displayed
- Music version 1.5.5.34、TV version 1.5.5.34
The topmost chapter track in the track list is used, regardless of the system language.
- Apple TV tvOS 18.5 [22L572]
- A chapter track with a language listed under Settings > General > Apple TV Language > Preferred Languages
- If no track matches the above languages, a chapter track with "Unknown Language"
- If neither is available, the topmost chapter track in the track list is used
However, chapter titles are shown as “Chapter 1”, “Chapter 2”, etc.
- Music、TV in iPhone and iPad version 18.5
These apps do not appear to support chapter selection
macOS and Apple apps may change how they handle chapter tracks in future updates.
To avoid situations where chapters are not displayed—especially when the file might be played in environments with different system language settings—adding a text track with “Unknown Language” is recommended, as shown below.
The chapter selection pop-up button next to the time bar in mChapters follows the same behavior as in QuickTime Player.
When opening a chapter-enabled file created with another app, you may sometimes see garbled text. This is typically caused by the lack of character encoding information, and changing the track’s language setting will not resolve the issue. Text tracks added with mChapters always include a specified character encoding—either UTF-8 or UTF-16. You can choose the encoding in the app's Settings (or Preferences, depending on macOS version).
In the Track List, select the text track you want to remove, then press the delete key.
Only text tracks can be removed.
In the Track List, select the text track you want to duplicate, then choose Edit > Duplicate from the menu.
This is useful, for example, when creating chapters in another language based on the same content.
- In the Track List, select the text track where you want to add a chapter.
- Move the playhead to the desired position, then click the "﹢" button in the bottom left corner of the window or choose Chapters > Add Chapter from the menu. A new chapter with a temporary title will be added at the playhead's current time.
If no text track is selected, or if the playhead is positioned on an existing chapter, the "﹢" button and the Add Chapter menu item will be grayed out.
In the Chapter List, select the chapter you want to remove, then press the delete key or click the "﹣" button in the bottom left corner of the window.
You can also choose Chapters > Remove Chapter from the menu.
In MOV and MP4 files, time is managed and stored using two integer values: a Time Value and a Time Scale.
The Time Scale represents how many units a second is divided into—in other words, it defines the "temporal resolution" of the file, or how finely one second is split. Each file has its own Time Scale value, which is determined based on factors like the video's frame rate or the audio's sample rate. You cannot change this value.
Time can be calculated using the following formula:
Time Value / Time Scale = seconds
For example:
- If the Time Scale is 600, a Time Value of 1200 equals 2 seconds. A Time Value of 1500 equals 2.5 seconds.
- If the Time Scale is 100, those same Time Values correspond to 12 seconds and 15 seconds, respectively.
Here are more detailed examples:
| Example 1: Time Value: 2,160,000 Time Scale: 600 | ||
| 2,160,000 / 600 | = | 3600 sec |
| = | 60 min | |
| = | 01:00:00.000 | |
| With a Time Scale of 600, the maximum decimal value is .599 | ||
| Example 2: Time Value: 171,488,056 Time Scale: 44100 | ||
| 171,488,056 / 44100 | = | 3888 and (27256/44100) sec |
| = | 64 min 48 sec and (27256/44100) sec | |
| = | 01:04:48.27256 | |
| With a Time Scale of 44100, the maximum decimal value is .44099 | ||
You can check the Time Scale of a video in the duration display at the bottom right of the window. Clicking the time display cycles through three formats:
| 1. Time Value/Time Scale | 171,488,056/44100 | Shows the actual recorded Time Value and Time Scale. |
| 2. hh:mm:ss.xxx/Time Scale | 01:04:48.27256/44100 | Shows hours, minutes, seconds, and sub-second values based on the Time Scale. |
| 3. hh:mm:ss.xx | 01:04:48.62 | Shows hours, minutes, seconds, and sub-second values in centiseconds. 27256 / 44100 = 0.6180… → rounded to .62 |
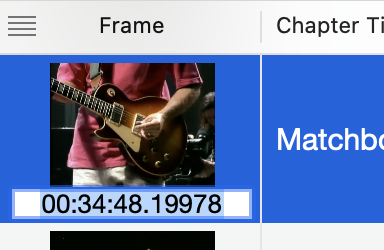
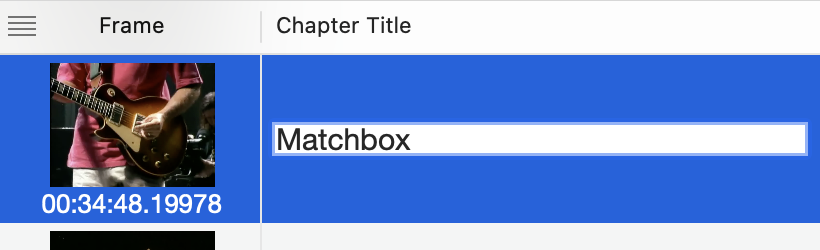
To edit a chapter's time or title, double-click the value you want to change.
Sub-second edits are made using the Time Value, not centiseconds. While centiseconds are easier to understand intuitively, converting them to Time Values can introduce rounding errors, which may lead to unintended results.
Drag the “Current Playback Time” display and drop it onto the chapter you want to update in the chapter list.
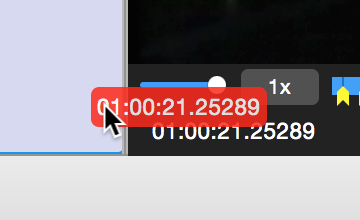
Alternatively, select the chapter you want to change in the chapter list, then choose Chapters > Replace with Current Playback Time from the menu.
You can also Control-click the chapter in the list to open the context menu and choose Replace with Current Playback Time.
The chapter time can only be set within the range between the start times of the previous and next chapters.
You can import chapter information from text files written in one of the following formats: mChapters, QuickTime, or Vorbis Chapter.
To import a file, drag and drop it into the window, or choose File > Chapter Title > Import… from the menu and select the file.
All formats must meet the following conditions:
- The file must be plain (standard) text with a .txt extension.
- The text encoding must be UTF-8.
- Sub-second values are required.
- The sub-second value must be in the range of 0 to Time Scale – 1, depending on the Time Scale used. See examples below:
Time Scale 100: 00 ~ 99
Time Scale 600: 000 ~ 599
Time Scale 44100: 00000 ~ 44099
- <@TimeScale:44100>
Optional Time Scale declaration. If omitted, the default Time Scale is 100. It’s recommended to use the same Time Scale as the video. - <@Start> and <@End>
Write chapter entries repeatedly between <@Start> and <@End>, in the order of Time followed by Title.
A line break between the time and title is allowed. - Any text before <@Start> or after <@End> (including before <@TimeScale:xxx> if present) will be ignored. This can be used as a comment area.
- Time format: [hh:mm:ss.xx]
Time values must be enclosed in square brackets. - Title format:
Line breaks, as well as whitespace and tabs before and after the title, will be removed.
To use a square bracket [ in a title, prefix it with a backslash \
Example: [ABC] ⇒ \[ABC]
Example:
<@Start>
[00:00:00.00000] Top of the Show
[00:08:41.37891] All My Loving
・
・
・
[01:32:09.02390] Back in the U.S.S.R.
<@End>
- Begin with {QTtext}, followed by {timeScale:xxx}, where xxx is the Time Scale value (required).
It’s recommended to use the same Time Scale as the video. - Time format: [hh:mm:ss.xxx]
Time values must be enclosed in square brackets. - Title format:
Write the time entry, then add a line break and then write the title.
Example:
[00:00:00.00000]
Top of the Show
[00:08:41.37891]
All My Loving
・
・
・
[01:32:09.02390]
Let It Be
- List each chapter by repeating the "time" and "title" entries in that order. Insert a line break between them.
- Time format:
CHAPTERXXX=hh:mm:ss.xxx
The Time Scale is fixed at 1000. If your video uses a different Time Scale, some rounding errors may occur. - Title format: CHAPTERXXXNAME=Chapter Title
- Sequential numbering:
The XXX part in both CHAPTERXXX and CHAPTERXXXNAME should be the same number, indicating the chapter's sequence.
Example:
CHAPTER001NAME=Top of the Show
CHAPTER002=00:08:41.859
CHAPTER002NAME=All My Loving
・
・
・
CHAPTER029=01:32:09.054
CHAPTER029NAME=Let It Be
Choose File > Chapter Title > Export...
You can export chapters in the following formats:
- List
- mChapters
- QuickTime
- Vorbis
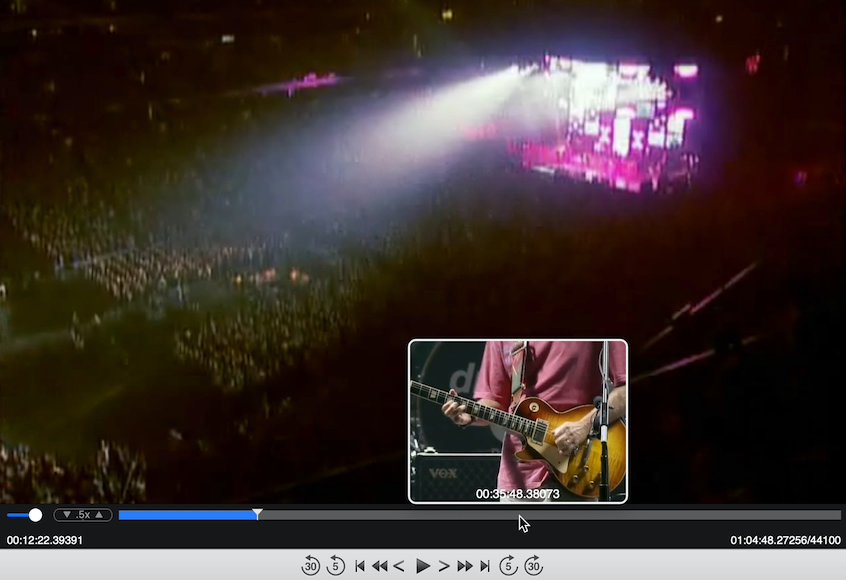
When you place the cursor over the time bar, a preview of the frame at that time appears.
To toggle the preview on or off, Choose View > Time Bar Preview
If you hold down the Shift key while moving the cursor over the time bar, the preview will temporarily do the opposite of the current setting—either hiding or showing accordingly.
To select a portion of the movie, choose Controls > Play Selection Only to display the In and Out selection markers on the time bar. Drag the markers to define the selection. To fine-tune the selection, click a marker to select it, then use the left or right arrow key to adjust its position.
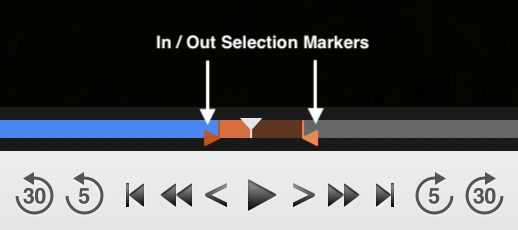
Choose Controls > Clear Selection to remove the selection range. Both the In and Out selection markers will move to the current playback header position, leaving no selection.
| Space bar or return | Play / Pause |
| command (⌘) + ↑ | Go to the beginning |
| command (⌘) + ↓ | Go to the end |
| option (⌥) + command (⌘) + ↑ | Go to the selection start |
| option (⌥) + command (⌘) + ↓ | Go to the selection end |
| ← | Go back one frame |
| → | Go forward one frame |
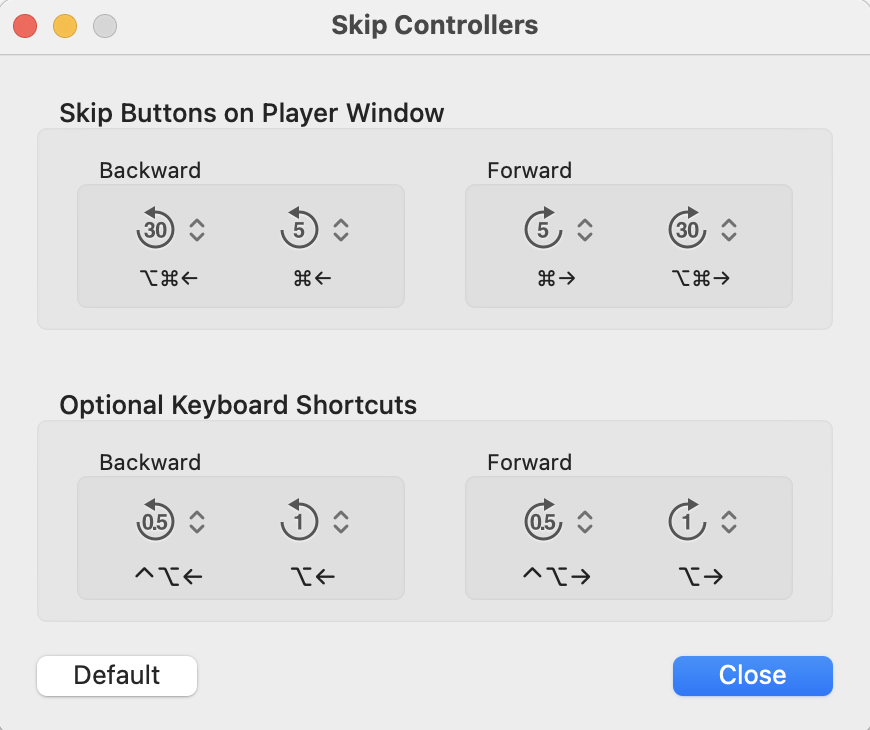
| command (⌘) + ← | Go back 5 seconds (Default) |
| command (⌘) + → | Go forward 5 seconds (Default) |
| option (⌥) + command (⌘) + ← | Go back 30 seconds (Default) |
| option (⌥) + command (⌘) + → | Go forward 30 seconds (Default) |
| option (⌥) + ← | Go back 1 second (Default) |
| option (⌥) + → | Go forward 1 second (Default) |
| control (⌃) + option (⌥) + ← | Go back 0.5 seconds (Default) |
| control (⌃) + option (⌥) + → | Go forward 0.5 seconds (Default) |
| J | Decrease playback speed |
| K | Normal playback speed |
| L | Increase playback speed |
| M | Reverse play |
Choose Controls > Customize Skip Times… to open the Skip Controllers window.
You can choose from 0.5, 1, 3, 5, 10, 15, 20, or 30 seconds.