Choose File > Open..., then select the file or files, and click Open.
Alternatively, drag and drop the file(s) onto the app icon in the Dock or Finder.
You can export the currently displayed frame as an image file.
- Click the Export in the toolbar. Or choose File > Export....
- In the save sheet, specify the export settings for the image, then click Save.
You can also drag the screen directly onto the Desktop (or Finder) to export the frame. In this case, the image will be saved using the settings from the save sheet.
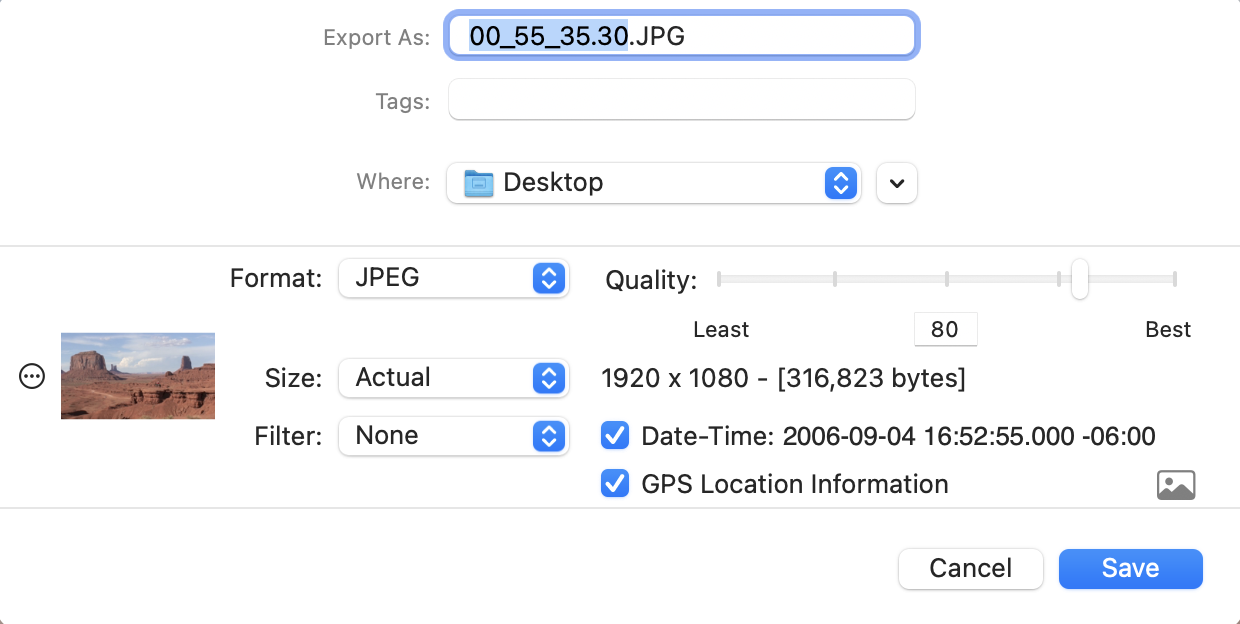
- Format:
JPEG, PNG, TIFF or HEIC - Size:
Actual, Half - Filter:
Black & White, Sepia Tone - Quality:
Adjustable for JPEG and HEIC - Date-Time and GPS Information:
Saved as metadata (Exif) in the image, with GPS included only if it exists in the video file.
You can click the date-time text to edit it.
Note: A video file contains only one set of location information. The same location data will be saved in the image regardless of which frame you export.
To export multiple images at once, you can add frames in the sidebar Queue.
There are two ways to add frames:
- Add manually: Display the frame you want to add, then repeat one of the following actions:
- Click Add to Queue in the toolbar
- Choose Controls > Add to Queue
- Drag the screen onto the Queue area in the sidebar
- Add with Continuous Grabbing:
Click Continuous in the toolbar, or choose Controls > Continuous Grabbing... to open the continuous grabbing sheet.
Frames will be added to the Queue at regular intervals starting from the currently displayed point.
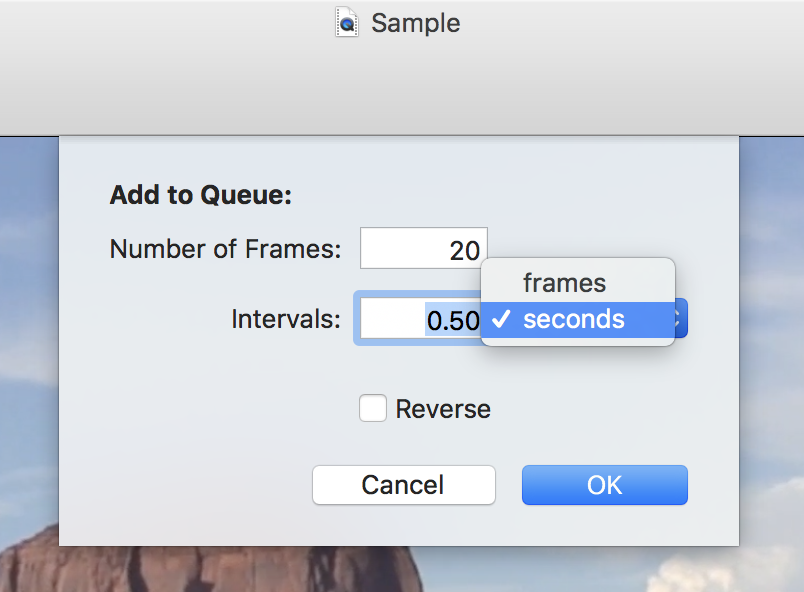
- Number of Frames:
The number of frames to add, starting from the currently displayed frame. - Interval:
The spacing between frames to add, and its unit. - Reverse:
Add frames in reverse order, starting from the currently displayed frame.
You can export all the frames in the sidebar Queue at once.
- Click Export Queue in the toolbar, or choose File > Export Queue...
- In the save sheet, specify the file name format and the export settings for the images, then click Save.
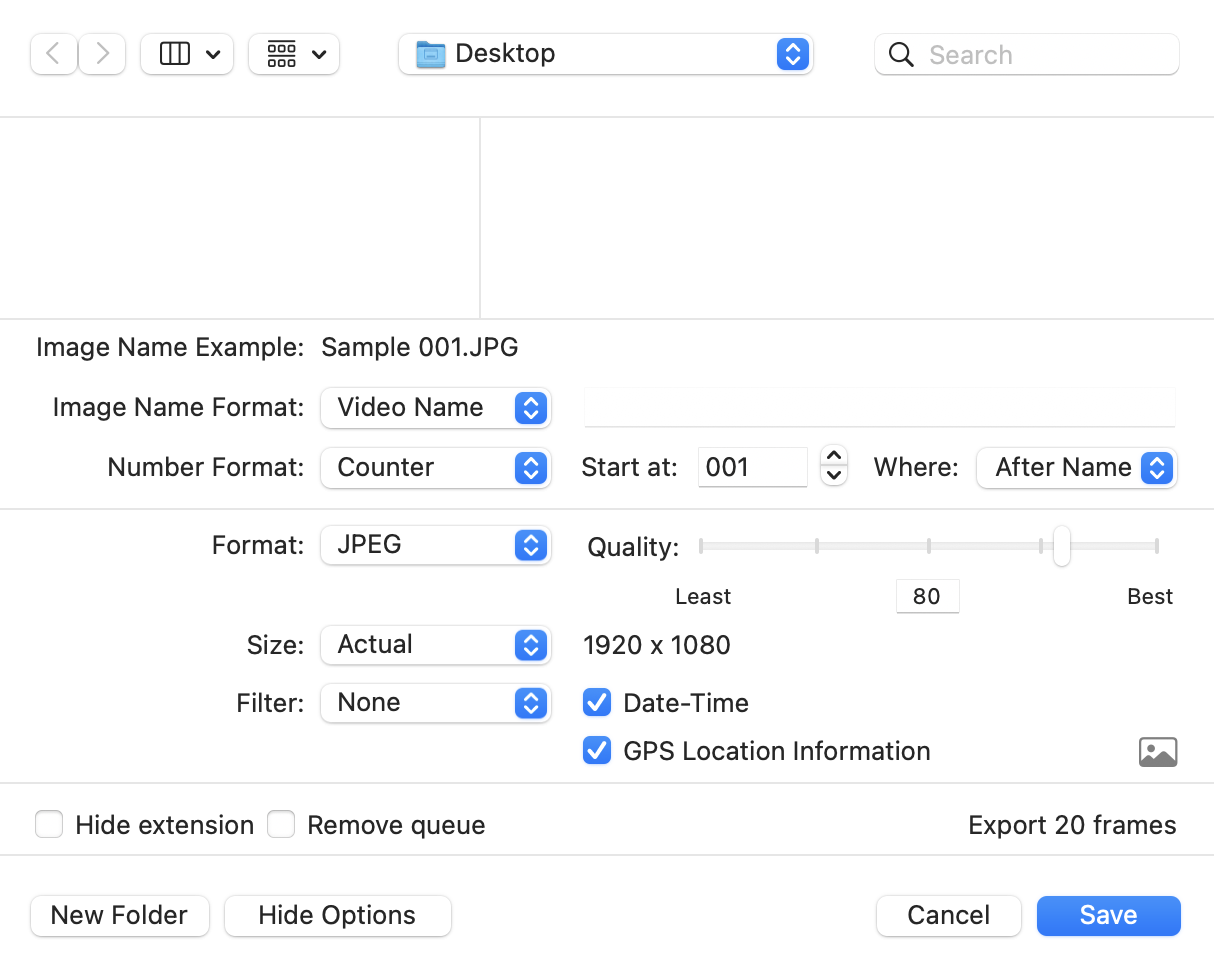
Each image file name combines a common title with a number.
- Image Name Format:
- Video Name: Use the original video file’s title
- Custom: Use a title specified by the user
- Number Format:
- Frame Time: The frame time of the exported image
- Counter: A sequential number
- Where:
The location of the number relative to the common title (before or after the title)
This app provides two time display formats: Centiseconds format and Timescale format. The difference lies in how times less than one second are represented.
Click the time display area to switch between the formats.
- Centiseconds Format:
A standard display format where fractions of a second are shown with two digits.
After 0.99 seconds, the next value is 1.00 seconds. - Timescale Format:
This format shows time exactly as it is recorded in the video file.
In MOV, M4V, and MP4 files, time is managed and stored using an integer value called the timescale, which represents the number of divisions per second. The timescale value varies depending on the video file.
The number of digits for the fraction always matches the timescale's digit count.- Example 1:
Timescale = 600→1 second = 600,0.5 seconds = 300,0.1 seconds = 060
After 0 + (599/600) seconds, the next value is 1 + (000/600) seconds. - Example 2:
Timescale = 44100→1 second = 44100,0.5 seconds = 22050,0.1 seconds = 04410
After 0 + (44099/44100) seconds, the next value is 1 + (00000/44100) seconds.
- Example 1:
In Timescale format, the “Video Duration” shown at the lower-right of the main window displays fractions of a second as a numerator/denominator fraction, where the denominator is the timescale.
| The example below is a video file with a timescale of 600. | |
| • Current playing time: | 1:31:20 and 522/600 seconds |
| • Video duration: | 1:52:01 and 533/600 seconds |

| In Centiseconds format, the fractions of a second of the above times become: | |
| • 522 / 600 = 0.87 seconds | |
| • 533 / 600 ≈ 0.888333, rounded to 0.89 seconds | |

Video files (MOV, M4V, MP4) store a creation date-time. (Note that this may differ from the “Created” date shown in Finder’s file information.)
This date-time is treated as the reference point, and the app calculates the date-time of each frame by adding its frame time. The calculated values are then saved as Exif metadata.
However, if a video file has been edited, its creation date-time may have been modified. Likewise, for video files created by combining multiple clips, it is not possible to calculate accurate frame date-times based solely on a single reference point.
To address this, you can assign a reference date-time to any chosen frame. From that frame onward, the app calculates and records Exif date-times based on the assigned reference point.
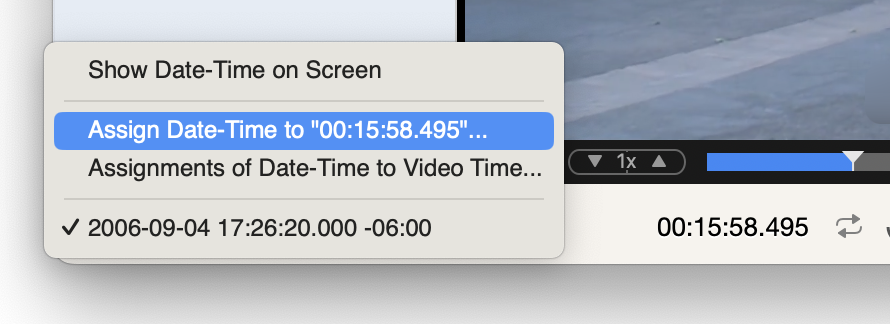
Choose View > Show Date-Time on Screen, or choose Show Date-Time on Screen from the pop-up button at the lower-left corner of the window.

- Display the frame for which you want to assign a reference date-time (in the example below: 00:08:10.13000).
- Choose the Assign Reference Date-Time for "00:08:10.13000"... item from the pop-up button as shown below.
Note: The frame time is always shown in Timescale format.
- In the displayed sheet, enter any desired date-time values.
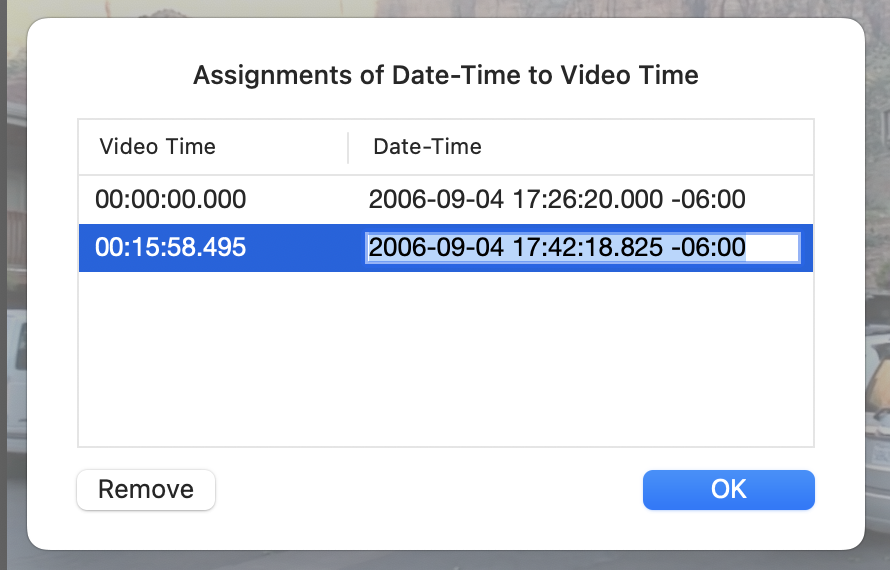
Choose the Edit Assignments... item from the pop-up button to edit date-time values in the displayed Frame Time & Reference Date-Time sheet.
Fractions of a second formats:
• Frame Time: shown in Timescale format
• Reference Date-Time: shown in milliseconds (1/1000 second units)
Please note that you should not confuse the two.
Reference Date-Time format:
• YYYY-MM-DD hh:mm:ss.sss ±hh:mm (The time zone offset is required.)

- You can assign up to 100 reference date-times per video file.
- The frame time and reference date-time assignment information is not saved in the video file itself.
It can only be used within this app.
To select a portion of the movie, choose Controls > Play Selection Only to display the In and Out selection markers on the time bar. Drag the markers to define the selection. To fine-tune the selection, click a marker to select it, then use the left or right arrow key to adjust its position.
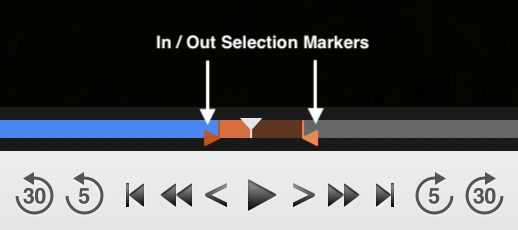
Choose Controls > Clear Selection to remove the selection range. Both the In and Out selection markers will move to the current playback header position, leaving no selection.
| Space bar or return | Play / Pause |
| command (⌘) + ↑ | Go to the beginning |
| command (⌘) + ↓ | Go to the end |
| option (⌥) + command (⌘) + ↑ | Go to the selection start |
| option (⌥) + command (⌘) + ↓ | Go to the selection end |
| ← | Go back one frame |
| → | Go forward one frame |
| command (⌘) + ← | Go back 5 seconds (Default) |
| command (⌘) + → | Go forward 5 seconds (Default) |
| option (⌥) + command (⌘) + ← | Go back 30 seconds (Default) |
| option (⌥) + command (⌘) + → | Go forward 30 seconds (Default) |
| option (⌥) + ← | Go back 1 second (Default) |
| option (⌥) + → | Go forward 1 second (Default) |
| control (⌃) + option (⌥) + ← | Go back 0.5 seconds (Default) |
| control (⌃) + option (⌥) + → | Go forward 0.5 seconds (Default) |
| J | Decrease playback speed |
| K | Normal playback speed |
| L | Increase playback speed |
| M | Reverse play |
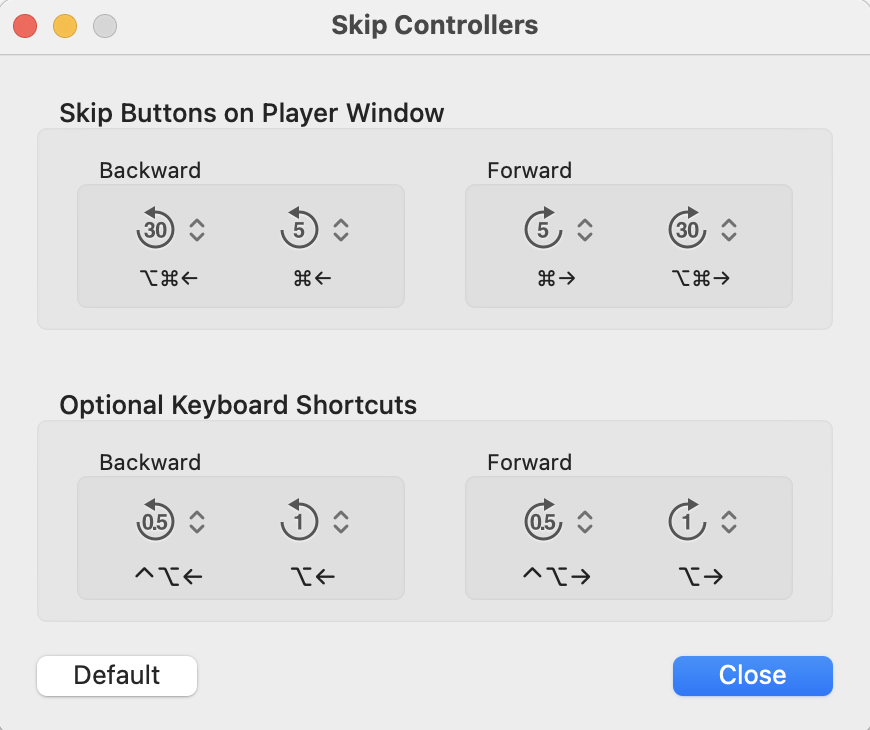
Choose Controls > Customize Skip Times… to open the Skip Controllers window.
You can choose from 0.5, 1, 3, 5, 10, 15, 20, or 30 seconds.